Wednesday, 2 July 2025

How to get PowerBI Embed Token

 Here's a step-by-step guide to help you through the process.

Step 1: Register Your App in Azure

  • 1. Go to Azure Portal → App registrations
  • 2. Register a new app.
  • 3. Provide necessary API permissions
  • 4. Go to Certificates & secrets → Generate a Client Secret


Step 2: Assign the App to the Power BI Workspace

1. Go to Power BI Service
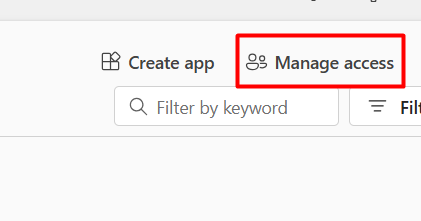
2. Click Workspace access
3. Add the App's Service Principal(App Registration ClientId) as an Admin or Member


Step 3: Get Access Token 

Request:

 Method: POST
 URL: https://login.microsoftonline.com/{tenant-id}/oauth2/v2.0/token


Headers:
Content-Type: application/x-www-form-urlencoded 

Body: (x-www-form-urlencoded):

grant_type=client_credentials
client_id={your-client-id}
client_secret={your-client-secret}
scope=https://analysis.windows.net/powerbi/api/.default


Endpoint will provide you with an Access Token


Step 4: Generate the Embed Token


URL: Post Endpoint 

https://api.powerbi.com/v1.0/myorg/groups/{groupId}/reports/{reportId}/GenerateToken


Headers

Authorization: Bearer <access_token>
Content-Type: application/json

Body

{
  "accessLevel": "View"
}


Sample Code to embed the PowerBI Report in an HTML Page


<script src="https://cdn.jsdelivr.net/npm/powerbi-client@2.21.1/dist/powerbi.min.js"></script>

<style>
    #reportContainer {
      width: 100%;
      height: 800px;
      border: 1px solid #ccc;
    }
  </style>

<div id="reportContainer"></div>

<script>
  
    const embedToken = "Call the APIs and pass the token here";
    
    const embedUrl = "https://app.powerbi.com/reportEmbed?reportId=report id here&groupId=group id here";

    const reportId = "your report Id here";

    // Embed configuration
    const config = {
        type: 'report',
        id: reportId,
        embedUrl: embedUrl,
        accessToken: embedToken,
        tokenType: window['powerbi-client'].models.TokenType.Embed,
        settings: {
            filterPaneEnabled: false,
            navContentPaneEnabled: true
        }
    };

    const reportContainer = document.getElementById('reportContainer');

    // Embed the report
    const powerbi = new window['powerbi-client'].service.Service(
        window['powerbi-client'].factories.hpmFactory,
        window['powerbi-client'].factories.wpmpFactory,
        window['powerbi-client'].factories.routerFactory
    );

    powerbi.embed(reportContainer, config);
</script>


Power BI - PowerBIEntityNotFound Error in Embed Report

Typically, PowerBIEntityNotFound indicates that the requested resource (report, dataset, or workspace) could not be found under the access token's permissions. 


{
    "error": {
        "code": "PowerBIEntityNotFound",
        "pbi.error": {
            "code": "PowerBIEntityNotFound",
            "parameters": {},
            "details": [],
            "exceptionCulprit": 1
        }
    }
}


You need to check a couple of things.

1. Ensure the workspace GUID is accurate. 


You can find it in the URL when viewing a report:
https://app.powerbi.com/groups/{workspace-id}/reports/{report-id}

2. Is the Report ID correct?

    same steps as above.

3. Does the service principal have access?

Your Azure AD app (service principal) must be added to the workspace as a member or admin:

Go to Power BI Service → Workspace → Access
Add the service principal (client ID) as a Member or Admin


4. Ensure service principal access is enabled in tenant settings


In Power BI Admin Portal: Go to Tenant settings

Enable:
"Allow service principals to use Power BI APIs"
"Allow service principals to create embed tokens."

5. Ensure you are using the correct scope and authority in the token request.

SCOPE = "https://analysis.windows.net/powerbi/api/.default"

Check all the above steps, and it will resolve the issue.

Wednesday, 25 June 2025

Create an Azure AD B2C (ADB2C) user using Postman

 Here's a step-by-step guide to help you through the process.

Registered App in Azure AD B2C with:

  • Delegated Microsoft Graph API permissions:
    • User.ReadWrite.All
    • Directory.ReadWrite.All
  • Client secret
  • Admin Consent granted for permissions


Step 1: Get Access Token 

Request:

 Method: POST
 URL: https://login.microsoftonline.com/{tenant-id}/oauth2/v2.0/token


Headers:
Content-Type: application/x-www-form-urlencoded 

Body: (x-www-form-urlencoded):

grant_type=client_credentials

client_id={your-client-id}

client_secret={your-client-secret}

scope=https://graph.microsoft.com/.default


Endpoint will provide you with an Access Token


Step 2: Create a User

Request:

Method: POST
URL: https://graph.microsoft.com/v1.0/users


Headers:

Authorization: Bearer {access_token}

Content-Type: application/json


Body (raw JSON):

{  
  "displayName": "sunny setia",
  "givenName": "sunny27",
  "surname": "setia",
  "identities": [  
    {  
      "signInType": "emailAddress",  
      "issuer": "tssorg.onmicrosoft.com",  
      "issuerAssignedId": "setia27@mailinator.com"  
    }
  ],  
  "passwordProfile":{  
    "password": "P@ssword1",  
    "forceChangePasswordNextSignIn": false  
  },  
  "passwordPolicies": "DisablePasswordExpiration"  
}  


Important:

  • The Issuer must follow your B2C tenant domain.
  • Use a strong password that meets AAD complexity requirements.


Monday, 31 March 2025

Enum with Flag Attribute in .NET


In .NET, you can use the Flags attribute with an enum. You can combine multiple values into one to represent a set of bit fields. It is useful when you want to combine options or states using bitwise operations.

Here is an example of how to define and use an enum with the Flags attribute:

[Flags]
public enum BankruptcyStatus
{
    None = 0,              // No status
    Filing = 1,            // Bankruptcy is filed
    Reorganization = 2,    // Bankruptcy is under reorganization (Chapter 11, for example)
    Discharge = 4,         // Debts have been discharged (Chapter 7, for example)
    Closed = 8,            // Bankruptcy case is closed
    All = Filing | Reorganization | Discharge | Closed  // All possible statuses
}


class Program
{
    static void Main()
    {
        // Assigning multiple flags to a variable
        BankruptcyStatus currentStatus = BankruptcyStatus.Filing | BankruptcyStatus.Reorganization;

        Console.WriteLine($"Current Bankruptcy Status: {currentStatus}");

        // Checking if a specific status is active
        bool isFiling = (currentStatus & BankruptcyStatus.Filing) == BankruptcyStatus.Filing;
        Console.WriteLine($"Is filing in progress? {isFiling}");

        bool isReorganizing = (currentStatus & BankruptcyStatus.Reorganization) == BankruptcyStatus.Reorganization;
        Console.WriteLine($"Is bankruptcy under reorganization? {isReorganizing}");

        // Adding a new status (Discharge)
        currentStatus |= BankruptcyStatus.Discharge;
        Console.WriteLine($"Updated Bankruptcy Status: {currentStatus}");

        // Checking if discharge has occurred
        bool isDischarged = (currentStatus & BankruptcyStatus.Discharge) == BankruptcyStatus.Discharge;
        Console.WriteLine($"Has the bankruptcy been discharged? {isDischarged}");

        // Remove the 'Filing' status (assuming bankruptcy filing is no longer active)
        currentStatus &= ~BankruptcyStatus.Filing;
        Console.WriteLine($"Updated Bankruptcy Status after removing Filing: {currentStatus}");
    }
}

[Flags] Attribute: The Flags attribute indicates that the enum values are bit fields, and you can combine them using bitwise operations.

Enum Values:

  • Filing = 1: Represents the status of the bankruptcy being filed.

  • Reorganization = 2: Represents the status of a reorganization process, like Chapter 11.

  • Discharge = 4: Represents the status where debts are discharged, like in a Chapter 7 bankruptcy.

  • Closed = 8: Represents the bankruptcy case being closed.

How to get PowerBI Embed Token

 Here's a step-by-step guide to help you through the process. Step 1: Register Your App in Azure 1. Go to Azure Portal → App registratio...