Wednesday, 11 September 2019

Infrastructure As Code: ARM Templates Deployment - Azure Portal

ARM Template Deployment in the Azure Portal


An ARM template is a JSON file used to configure and deploy various Azure resources.

If you want to deploy your ARM(Azure Resource Manager) Template in the Azure Portal then it is very easy. Just open the link https://portal.azure.com and login with your subscription.

Step 1 - Click on Create a resource button on the top left as shown in the snapshot below.


Step 2 - Type "template" in the search box and you will see the Template deployment option, click on that, as shown below.


Step 3 - Click on the create button as shown below.


Step 4 - Click on the "Build your own template in the editor"


 Step 5 - Paste your template on the right side and press save.


 Step 6 - Click on the purchase, it will validate and then execute the template. After then you can see the resource has been created.


This is all about the article. thanks for reading it.

Thursday, 5 September 2019

Introduction of Azure Function, Types and Deployment

Azure Function


Azure Functions is the serverless computing service hosted on the Microsoft Azure public cloud.
Serverless computing is a very popular term. In most of the cloud technical sessions and the conference, you will hear this term.

In Serverless, you will still write your server-side logic but, unlike traditional architectures, it’s run in stateless compute containers that are event-triggered.

You use Azure Functions to host small applications, like background jobs or small tasks that only runs for a short period. Just like the Logic Apps, Azure Functions are serverless as they scale automatically and you only pay for them when they run. Its Pay as you go.

Similar Technologies

AWS Lambda
Google Cloud Functions
Open Whisk (IBM)


How Azure Function Works


Below are the prerequisite before creating Azure Function

Active Azure subscription 
Azure Storage account.

The developer creates a function and the required code will be deployed in the cloud.

Function Types

Azure Functions has predefined templates. There are many function types available. However, we will discuss the most common function types.

HTTPTrigger

It triggers the execution by using an HTTP request. You can call the Azure function through an API client like Postman.

TimeTrigger
We use this trigger when we want to run our function on a specific time interval.

BlobTrigger
We use this trigger when we want the azure function to trigger automatically when any file is being uploaded to storage Blob.

QueueTrigger
We use this trigger when we want the azure function to trigger automatically when an entry is being added to the queue.

ServiceBusTrigger
The Azure function runs automatically by listening to message queues.

Create Azure Function in Visual Studio


For creating the project in the Visual Studio, Go to File -> New ->Project

I'm using Visual Studio 2019. Find the azure function in the Project Type "Cloud"
Make sure you have a cloud component installed in visual studio.


After then It will ask you to select Function type and Storage account. Select the browse in a storage account and connect with your Azure Subscription. Azure function needs storage account as it places its default file in the azure blob.


Here in this example, I've selected Time trigger function. By default its set to 5 minutes. You can change the time interval at any point.


You can implement your logic in the Run method.

Deployment of Azure Function

You can easily deploy your azure function by right click on the project as shown in the snapshot above and click publish button


We have 3 plans available.

Consumption Plan

Azure Functions host is dynamically added and removed based on the number of incoming events. When your function runs, Azure provides all of the necessary computational resources. You don't have to worry about resource management, and you only pay for the time that your code runs.

Premium Plan

When you're using the Premium plan, instances of the Azure Functions host are added and removed based on the number of incoming events just like the Consumption plan.

App Service plan

Run your functions just like your web apps. When you are already using App Service for your other applications, you can run your functions on the same plan at no additional cost.


In my example, I'm selecting a consumption plan. You need to specify your
Function app - Name of your function app.
Subscription - Your azure subscription.
Resource group - Resource groups in Azure is a new approach to group a collection of assets.
Location - Select the global region where you want to create the Azure function.
Azure Storage - Storage to save the files.


Once the published is complete, you can see new App Service and Service plan is being created in the Azure Portal.


When you expand the "demoazurefn", you can see your function there.


Once you run the azure function, you see the log in the screenshot below. It means function ran successfully.


You can also create the azure function in the Azure Portal itself. Please follow below to create the azure function in the portal

Create Azure Function in the Azure portal.


Step 1: Click on the "Create a resource" button and search "function app"
Step 2: Click on the create button on the next page.


Step 3: Select the Function App Name, Resource Group, Storage etc as shown in the snapshot below and click create.


Step 4: Once you press the create, the system will validate all the details and create the function app in the Azure portal.
Step 5: Function app is ready now, and it's empty. You can now add your function in the function app by clicking the + button as shown below.


This is all about the azure function, hope you like it.

Friday, 3 May 2019

Check SQL Database size


SQL Query to calculate database size


Below is the query to check the disk space.


SELECT      sys.databases.name as DBName,
            CONVERT(VARCHAR,SUM(size)*8/1024)+' MB' AS [Disk Size]
FROM        sys.databases 
JOIN        sys.master_files
ON          sys.databases.database_id=sys.master_files.database_id
GROUP BY    sys.databases.name
ORDER BY    sys.databases.name


How to check log size and clear log


DBCC SQLPERF(logspace)
DBCC LOGINFO


Below is the query to shrink the log. The first parameter is the log name. you can get the name by pressing the right click on the database and click Properties and then select Files Tab. The second parameter is database size in MB

DBCC SHRINKFILE (ReportServer_log, 8);


Tuesday, 19 September 2017

Ionic 3 Login Screen and Validations


Login Screen with validations


In this article, we will discuss Ionic3 and angular 2 validations. How we can display validation messages.

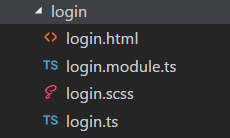
Let's create a new login page in the application. You can either add all the pages (.ts .html and .scss file manually) or you can create by running the command mention below.

ionic generate page Login.

it will automatically add a page in your application as shown in below snapshot.


Login.ts


1) Open Login.ts file and import form builder, form group and validators

import { FormBuilder, FormGroup, Validators } from '@angular/forms';


2) In Constructor, add form builder as a parameter as shown in below snapshot.
3) Declare account as any object and add 2 properties "email" and "password"
4) For Email, compose validators (Required and Email type) as shown below.


 export class LoginPage {
  account:any;
  constructor(public navCtrl: NavController, public navParams: NavParams,public alertCtrl: AlertController, formBuilder: FormBuilder) {

   this.account = formBuilder.group({   
   email: ['', Validators.compose([Validators.required,Validators.email])],     
   password: ['',Validators.compose([Validators.required,Validators.maxLength(5)])]
    }); 
  }
 }


5) For Password, we have set required and max length 5.


Construct HTML Form


1) Open Login.html file, pass account model in formGroup
2) formControlName to textbox
3) [class.invalid], if you want to give a red border on validation. This is custom class mention below
4) With the help of hasError property, you can check the exact error.
5) Disable login button, if page is not valid [disabled]="!account.valid"


account.controls.email.hasError('required') 
account.controls.email.hasError('email') 
account.controls.email.hasError('maxlength') 
account.controls.email.hasError('minlength') 
account.controls.email.hasError('pattern') 


<form  [formGroup]="account" (submit)="doLogin()">
    <ion-list>
      <ion-item>
        <ion-label floating>Email</ion-label>
        <ion-input type="text" formControlName="email"      
        [class.invalid]="!account.controls.email.valid  && account.controls.email.dirty">   
       </ion-input>      
      </ion-item>
     
    <p class="errorMessage" *ngIf="!account.controls.email.hasError('required')          && account.controls.email.hasError('email')  && account.controls.email.dirty)">
    Please enter a valid email.
    </p>

    <p class="errorMessage" *ngIf="account.controls.email.hasError('required') 
    && (account.controls.email.dirty )">Please enter email
    </p>     
  
   <ion-item>
    <ion-label floating>Password</ion-label>
    <ion-input type="password" formControlName="password"                 [class.invalid]="!account.controls.password.valid && account.controls.password.dirty">
    </ion-input>
   </ion-item>
   
  <p class="errorMessage" *ngIf="!account.controls.password.hasError('required')       && account.controls.password.hasError('maxlength') 
    && (account.controls.password.dirty)">Max length should be 5.
   </p>
    
    <p class="errorMessage" *ngIf="account.controls.password.hasError('required')       && (account.controls.password.dirty)">
    Please enter password
    </p>     
  
    <div padding>
        <button ion-button color="dark" block type="submit"  [disabled]="!account.valid">Login</button>
    </div>
    </ion-list>
  </form>


Styling the Form


1) Open Login.scss file.

page-login {
    .invalid {
    border-bottom: 1px solid #FF6153;
    }
    .errorMessage
    {
        color: red;
        font-size: 10px;
        margin-left: 20px;
    }
}


Submit Button Functionality


Login button functionality, I've checked with static email and password.
If both are matched then redirect to Next Page otherwise show an alert message.
Open Login.ts file and paste the below method in it.

doLogin() {     
      if(this.account.value.email =="test@gmail.com" && this.account.value.password=="test")
        {
           this.navCtrl.push(TabsPage);
        }
       else{
          let alert = this.alertCtrl.create({
            title: 'Message',
            subTitle:'Invalid Login',
            buttons: ['OK']
          });
          alert.present();
          }
   }


For alert, you need to import Alert Controller on top of the page.
For navigation, we need the Nav Controller.

import { IonicPage, NavController, NavParams } from 'ionic-angular';
import { AlertController } from 'ionic-angular';


We've already passed the alert and navigation controller in constructor as shown in first snapshot.


The Output would be like below screenshot.


Button will be enabled only, if we will input valid text in the textbox.

That's all about the article. Thanks for reading. If you have any question related to this article. you can mention in comments box below.


Friday, 9 June 2017

SSRS - Switch Statement

Problem: Display month (1,2,3 to January, February and March)

Right click on the expression, it will open popup and paste the below expression there.
In below expression, MonthNumber is the column name, if column value is 1 then change to January and so on with the help of switch statement.

=switch(
Fields!MonthNumber.Value=1,"January",
Fields!MonthNumber.Value=2,"February",
Fields!MonthNumber.Value=3,"March",
Fields!MonthNumber.Value=4,"April",
Fields!MonthNumber.Value=5,"May",
Fields!MonthNumber.Value=6,"June",
Fields!MonthNumber.Value=7,"July",
Fields!MonthNumber.Value=8,"August",
Fields!MonthNumber.Value=9,"September",
Fields!MonthNumber.Value=10,"October",
Fields!MonthNumber.Value=11,"November",
Fields!MonthNumber.Value=12,"December"
)


Thursday, 11 May 2017

SSRS - The report definition has an invalid target namespace Error

This error normally occurred when you created a report on one SQL version and deploying/opening on another SQL version.

I've created my SSRS report on SQL 2016 and I'm trying to open it on SQL 2014 Report Builder. I'm getting below error.

The report definition has an invalid target namespace 'http://schemas.microsoft.com/sqlserver/reporting/2016/01/reportdefinition' which cannot be upgraded.


The solution of this problem is, just open the report in XML format and changed the following lines.


<Report xmlns:rd="http://schemas.microsoft.com/SQLServer/reporting/reportdesigner" xmlns:cl="http://schemas.microsoft.com/sqlserver/reporting/2010/01/componentdefinition" xmlns="http://schemas.microsoft.com/sqlserver/reporting/2016/01/reportdefinition">


to 


<Report xmlns:rd="http://schemas.microsoft.com/SQLServer/reporting/reportdesigner" xmlns:cl="http://schemas.microsoft.com/sqlserver/reporting/2010/01/componentdefinition" xmlns="http://schemas.microsoft.com/sqlserver/reporting/2010/01/reportdefinition">


 Just change 2016 version as shown above and remove below lines


Search "ReportParametersLayout" in the code and remove the whole block. This code is only for SQL 2016.

 <ReportParametersLayout>
    <GridLayoutDefinition>
      <NumberOfColumns>2</NumberOfColumns>
      <NumberOfRows>2</NumberOfRows>
      <CellDefinitions>
        <CellDefinition>
          <ColumnIndex>0</ColumnIndex>
          <RowIndex>0</RowIndex>
          <ParameterName>EndDate</ParameterName>
        </CellDefinition>
        <CellDefinition>
          <ColumnIndex>1</ColumnIndex>
          <RowIndex>0</RowIndex>
          <ParameterName>EntityId</ParameterName>
        </CellDefinition>
        <CellDefinition>
          <ColumnIndex>0</ColumnIndex>
          <RowIndex>1</RowIndex>
          <ParameterName>StartDate</ParameterName>
        </CellDefinition>
      </CellDefinitions>
    </GridLayoutDefinition>
  </ReportParametersLayout>

After then, you can see your report will open properly in SQL 2014

Wednesday, 10 May 2017

SSRS - Remove decimals If result is whole number


Remove decimals If value is whole number.

Example: If value is 28.00 then report should show 28 and If value is 28.25 then report should show 28.25

How we can achieve this.

Add expression in this report and add below lines.


=Replace(Round(Fields!HourPerWeek.Value,2),".00","")

or

=CDec(Replace(Fields!HoursPerWeek.Value,".00",""))

Enum with Flag Attribute in .NET

In .NET, you can use the Flags attribute with an enum. You can combine multiple values into one to represent a set of bit fields. It is use...